Thursday, November 13, 2014

Thanksgiving Break is a mere 12 days away...

It's been a theme on my facebook feed lately- I've seen no less than fifteen posts of members of my graduating class who have been dipping their own toes into the world of food, and all of them made the same thing: Portillo's Chopped Salad.

It happens to everyone who leaves the northwest suburbs, as far as I can tell. You miss the food, the ever-present abundance of delicious, Italian-influenced food. And while the pizza places and the beef places and the hotdog places are all equally delicious and equally available, none is missed more by the transplanted Chicago suburbanite than Portillo's. 

What I, and apparently, the rest of my graduating class, miss the most is the famous chopped salad. I introduced my friend Jen to it when we visited Illinois in September and the first thing she said when I started this blog (right after "I'm so proud of you!" Thanks Jen!) was that I had to make the delicious salad we'd had.

The recipe I found online was enough for (as I realized after) ten servings. For my purposes, I divided it in half, and it still made enough to fill my largest mixing bowl. 

Here we go!

  1. Cook four cups of ditalini pasta according to package instructions. Make sure you salt the pasta water while cooking to give it some flavor. Drain and cool. Set aside. For the love of God, and listen very carefully because I will never say this ever again, do not make that much pasta. Cut this in half when making the full recipe. Four cups is way too much. 
    Look at all that Ditalini
  2. Cook bacon in a skillet until done. Let bacon cool, then crumble. It should be about one cup. I used one of the little bags of bacon bits. I have no idea how to fry bacon, what am I, a gourmet chef? That's a whole 'nother post waiting to happen. 
  3. Combine three cups chopped romaine lettuce, three cups chopped iceberg lettuce, two and a half cups of chopped red cabbage in a bowl. Walmart didn't have red cabbage, but the other two worked fine. ALSO. After reading some comments on the original post, I saw someone who recommended using a pastry blender with actual blades at the end to chop and mix the lettuce and other ingredients together. While I did pre-chop the lettuce, the pastry blender was chopping it even further in the bowl, and great for mixing it all together.

    With the pastry blender
  4. Add one cup sliced green onions and two fresh tomatoes, seeded and diced. So, I recently discovered that Netflix has other shows that aren't Gilmore Girls available. Cooking shows, even! So in the last week and a half, I've devoured the 25 episodes of Good Eats they have available, and one of them even went over how to seed a tomato. So tonight, when it said that in the recipe and I actually knew how to do it, I was ecstatic. I learned something new, guys!
    The tomato on the left is "seeded"
    Basically, you juice the tomato like a lemon.
    So easy!
  5. Add one cup of gorgonzola cheese, cooled ditalini, and two cups cooked and diced chicken. You all have born witness to my battle with the Chicken from Hell. It did not cooperate for this recipe. Luckily, it's not required for this salad to be delicious!
  6. Mix in dressing right before eating and enjoy!


The original poster also gives a recipe for the fancy sweet Italian dressing that makes this salad so delicious. It requires the following:

  • 1/4 cup balsamic vinegar
  • 2 cloves garlic, peeled and minced
  • 1 teaspoon sugar
  • 1/2 teaspoon dried oregano
  • 1/4 teaspoon salt
  • 1/4 teaspoon freshly ground black pepper
  • 1/2 cup olive oil 
She directs that you place everything but the olive oil into a blender and then, while the blender is running, drizzle the olive oil through the blender tube until combined. I do not own a blender, so I could not do that. I did, however, combine everything in a large cereal bowl and whisked it until it thickened up a little, and it tasted fine!
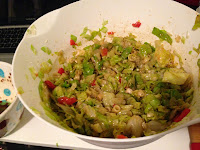
End Result!

All in all, not quite as good as Portillo's, but pretty darn close. Now, I know that my favorite meal is easy to make, and my poor parents don't have to take me straight to Portillo's as soon as I cross the state line every time I come home. I mean, I'll probably still make them take me. Why not? :)

I will post again tomorrow because I was too full after eating this to move, much less cook another recipe. Luckily, I have all morning tomorrow! If you have any suggestions for recipes or techniques to try, please don't hesitate to comment below or email me at dontexpectmiraclesblog@gmail.com. Thank you for reading!

Original Recipe: http://www.the-girl-who-ate-everything.com/2013/06/portillos-chopped-salad.html#LZB9fhW0SJOVW53d.99


Tuesday, November 11, 2014

The Chicken From Hell Returns!

Sorry about last week! I had an old friend from high school come visit and that threw my whole weekend preparation off. But, don't worry, I still had time to make some food!

Today's recipe contains the Chicken From Hell and is courtesy of my Grandma Jo. It's called Chicken Fiesta, and it's a four-ingredient recipe my grandma handed to me on a card the day I left Chicago to come back to school after summer break.

Ordinarily, it's made in a huge crock pot and feeds my sub-section of our enormous extended family. I don't have a crockpot big enough to feed an army of a small country, but I do have one of those tiny-baby crock pots. It's red. I love it, even if all I've used it for up to this point is to warm chili or italian beef while I'm at a night class.

This recipe took almost no time, almost no prep, and almost no thought. But it's delicious, and I will definitely make this again next time I have to be at class for six straight hours. Also, unfortunately iCloud confuses me and it would appear I deleted all the pictures I have of this. But again, very easy. You'll be able to figure it out. :)

Here's what you'll need!


  • Eight chicken breasts, cubed. I used two. Probably could've gone with three. 
  • Two cans of diced tomatoes. I used one. I eat tomatoes like candy.
  • One can of corn, drained. I used one of the little itty-bitty cans. Next time, I'll go one further and use only half of that.
  • One packet of taco mix. You might remember that I like things spicy. I used the full packet. #YOLO


The actual process of making this is simple.

  1. Defrost chicken (it only took 26 hours this time, guys! Improvement!)
  2. Cut into cubes. Throw into adorable crock pot. 
  3. Add diced tomatoes. 
  4. Add Corn. 
  5. Add taco mix. 
  6. Stir to combine.
  7. Place lid on crock pot, cook on low for 8 hours. Between the reduced yield (that's a cooking word, right?) and the smaller pot, mine was ready in about 4.  
And there you have it! Chicken Fiesta, ready to serve. It's delicious and warm and perfect with tortilla chips. You can even add sour cream or cheese to it, but it's so tasty, you don't have to!

Since I missed last Thursday, I'm going to be doubling up this Thursday. That's right folks, two posts for the price of one! I'm still not quite sure what I'm going to be making, but either way, it'll be an adventure. As always, please feel free to suggest meals or techniques you would like to see! I've appreciated every comment I've received. If you do have a suggestion or a question, or a hilarious youtube video of a cat you think I should see, please feel free to email me at dontexpectmiraclesblog@gmail.com. Thanks for reading!

Tuesday, November 4, 2014

Pull-Apart P i z z a B r e a d

Soooooo. Slight change of plans, because the Chicken From Hell took two full days to defrost again. Today's post will cover what I think will be a new staple in my apartment, albeit with some tweaking: Pull-apart Pizza Bread.

Have you ever heard of monkey bread? That delicious, rich, vein-clogging goodness that you make out of sugar and cut up grands biscuits and sugar and butter and sugar? Yeah. This is that, but with pizza, and it's easier to make and definitely easier to clean up.

Right, the pan thing! This recipe requires a special kind of pan- you want one that has the hole in the middle. I used an Angel Food Cake Pan from Walmart that cleaned up pretty nice after cooking. The special thing about it is that it has a removable section, so it's easy to get the cake (or monkey bread or pizza bread) out after it's been in the oven and glommed onto the pan. After using a pan that was all one piece to make monkey bread in high school, I would definitely recommend the two-piece model. And, even with having to buy the pan, this recipe was still pretty cheap and it made a LOT.

Here's how to make it:

  1.  Preheat oven to 350 degrees. Totally did that. I'm getting better at this "remembering to preheat the oven" thing.
  2. Cut 2 packets of grands biscuits into quarters. Put into Angel Food Cake Pan or Bundt Pan. After the first package, I threw in some cheese so that there was an even cheese distribution throughout.  
    Ready to bake!
  3. Cut pepperoni into smaller pieces. For this, I used turkey pepperoni because I find that it crisps up a bit more, and it's not quite as greasy. But don't stop with pepperoni- you can put any pizza topping you want into this pizza bread. Toss into pan with quartered biscuits. 
  4. Mix in 1/3 cup olive oil, 2 tablespoons of Italian Seasoning, and as much cheese as the spirit moves you to. Mix all ingredients so that oil evenly coats each piece of dough. If you're using the two-piece pan, this can get a little messy, so be careful and make sure the pieces stay firmly together. 
  5. Bake for about 30 minutes (or until top is brown and the center is thoroughly cooked). This is where we ran into some issues. My poor neighbor was forced to be my guinea pig, and I didn't realize until after I served it that there were some pieces that were still just a tad gooey. But, no worry. As far as I know, neither of died or got violently ill, so that's... a plus, right?
  6. Flip over onto a plate while still hot. This is where the two-piece specialness helps a lot. The outer ring just slips off while the tube part stays in place and you can pluck it out. 
    Seriously, look at how good that looks.
  7. Serve with a side of sauce and enjoy! I drizzled balsamic vinegar all over it, and it was divine, even with the gooey pieces.

Another extremely interesting cooking adventure on my end, yes. But this recipe was great. Thank you, Lynsey, for being such a trooper and sticking with me through this, I'm glad you didn't die from it :)

All in all, I'm going to have to mess around with the cooking times next time I make this. I worry that if I leave it in any longer, the top and outside will burn. But, this was a great, easy dish that would be great to bring to someone's house for game day or study night. Next time I make it, I'll try a different bake time, and I'll also add some more pizza toppings, like veggies! 

Hopefully the Chicken From Hell will be defrosted in time for Thursday's meal. It's been recommended that I try boiling it. I've never boiled meat of any kind before, so if I do that, it'll be a whole new kind of first. We'll see! 

I did go grocery shopping, and I was amazed at how much money I saved by making a list and an actual meal plan. I have a whole slew of fantastic meals planned for the next month, and I'm so excited! To those of you who have been reading, thank you for your support! I've appreciated every comment, every suggestion, and every encouragement. I'm always open to suggestions and I have a little bit of wiggle room! If you have any specific recipe or technique you would like to see, comment below or email me at dontexpectmiraclesblog@gmail.com, and I will do my best to attempt it! Thank you for reading!

Here's the original recipe: http://sweetandsimpleliving.com/easy-pull-apart-pizza-bread/